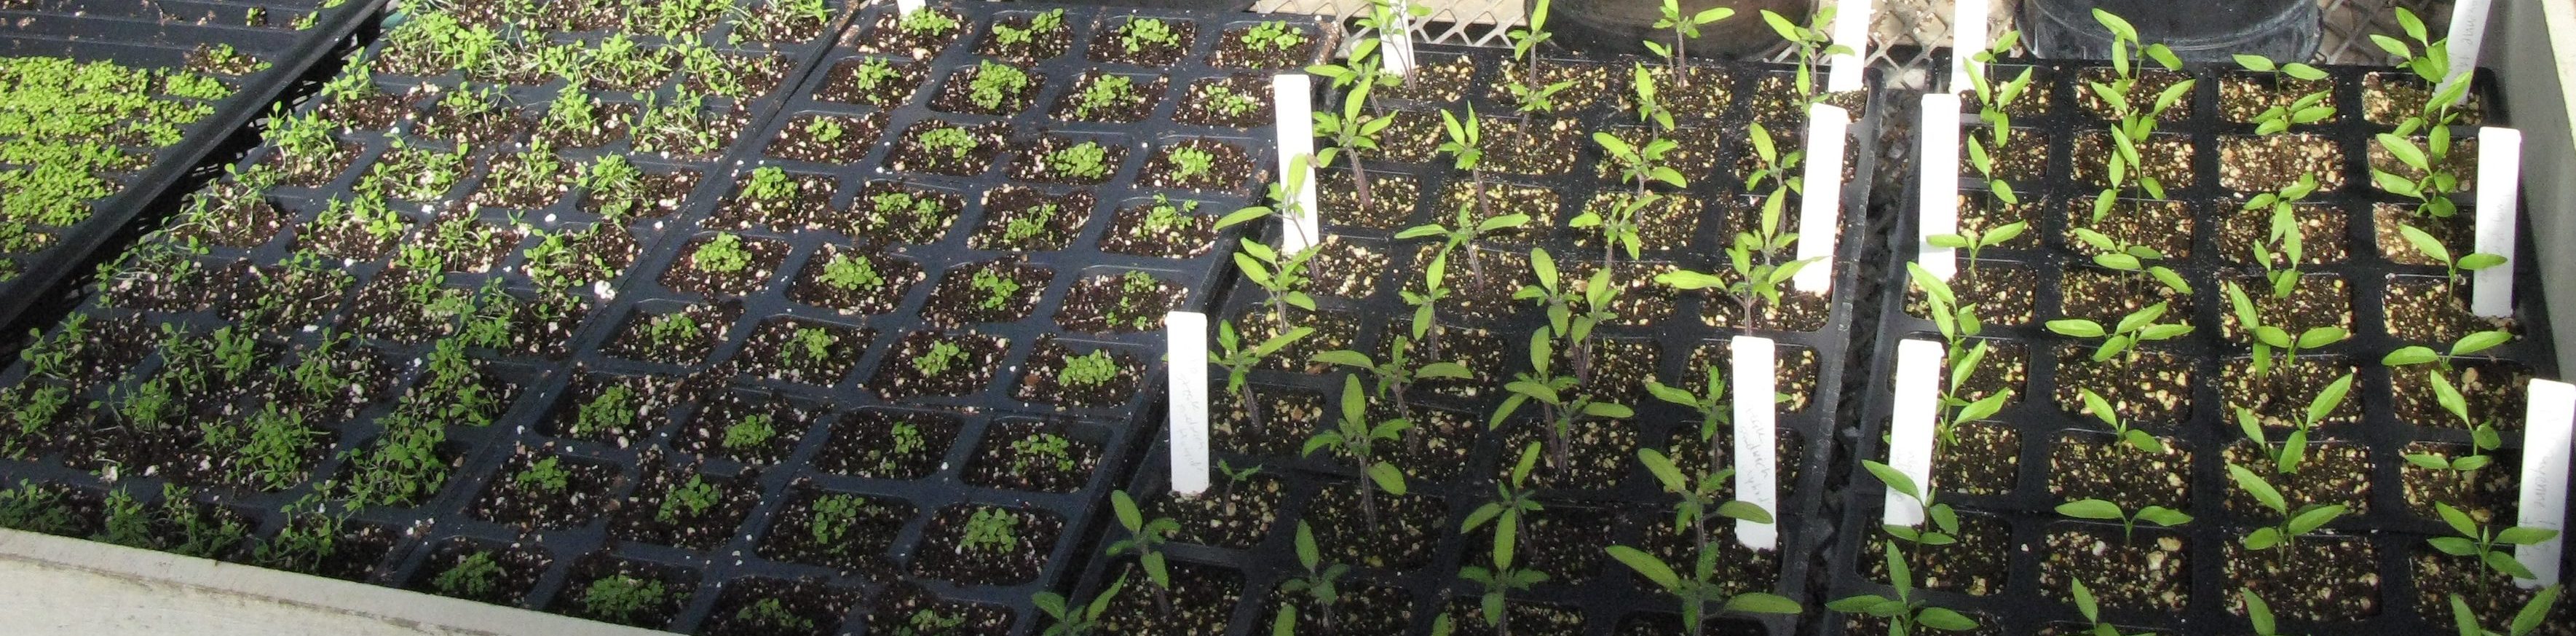
After enduring months of bleak outdoor landscapes, the long ramp up to spring can be tough on gardeners — leaving us itching to get our hands in the dirt and just plant something. Inhospitable as the outdoors may still be for tender plants, there is a tried and true antidote for gardeners’ particular brand of spring fever: sowing seeds indoors.

Annuals get a great head start on flowering when they begin life indoors. Pictured above are ‘Profusion’ zinnia, which are very easy to grow from seed–even for beginners. (Photo by Elena Kyuchukova)
Cold Comfort: The advantages of seeds
Starting seeds indoors offers some significant benefits. For one thing, buying seeds is a lot cheaper than buying plants, allowing you to indulge in those dramatic mass plantings and deep drifts you’ve been dreaming of –without breaking the bank. For a minimal investment in a packet of seeds, you can populate your garden with plenty of new plants –and have enough left over to share with friends and fellow gardeners!
Seeds also afford you the opportunity to try out new or exotic varieties that you won’t find in mass market outlets or local garden centers. Retail space is always at a premium, but especially in springtime. So plant purveyors tend to focus on a limited number to “regulars” that they know will sell. By raising your own plants from seed, you give yourself a wider palette of plants to work with.
Given our somewhat short growing season here in the Mid Atlantic, jump starting plants inside can also nudge slow starters into earlier bloom and allow vegetables that wouldn’t ordinarily grow in our region enough time to mature.

The sleeping potential contained in each seed has the power to transform your garden –and your outlook– without blowing your budget.
In addition to all these good and practical reasons for starting seeds, if you ask veteran seed-starters why they do it, they will often tell you that there is just something magical about planting a small, hard fleck of possibility and watching it grow into a supple, living shoot. No matter how many times you’ve experienced it, they’ll say, it never ceases to amaze. So, if you haven’t tried it before, now is great time to start. And if you have, well… it’s time to get growing!
Sow What? Plan before you plant
When it comes to choosing which plants to grow from seeds, the sheer volume can be overwhelming. And every year, new and exciting hybrids and varieties are added to the mix. Combine this with page after page of luscious photos and glowing descriptions, and you have a recipe for overbuying. So, if you’re new to seeds, starting small is key.
But it behooves both rookies and veterans alike to take a close look at their garden before buying, and come up with some kind of plan – one that takes into consideration how much space you have and the conditions in your garden. (For help with planning, see: Basics of Flower Gardening and Planning a Vegetable Garden from Rutgers.)
And don’t forget to take into account how much time (and space) you have inside for growing all those seeds…
Once you’ve established your limits, there are as many ways to research seeds as there are gardeners. Whether you enjoy pouring over seed catalogs, watching gardening shows, or developing your Pinterest board–the time you invest in planning your seed-starting endeavor will end up saving you time, effort and cash later on.
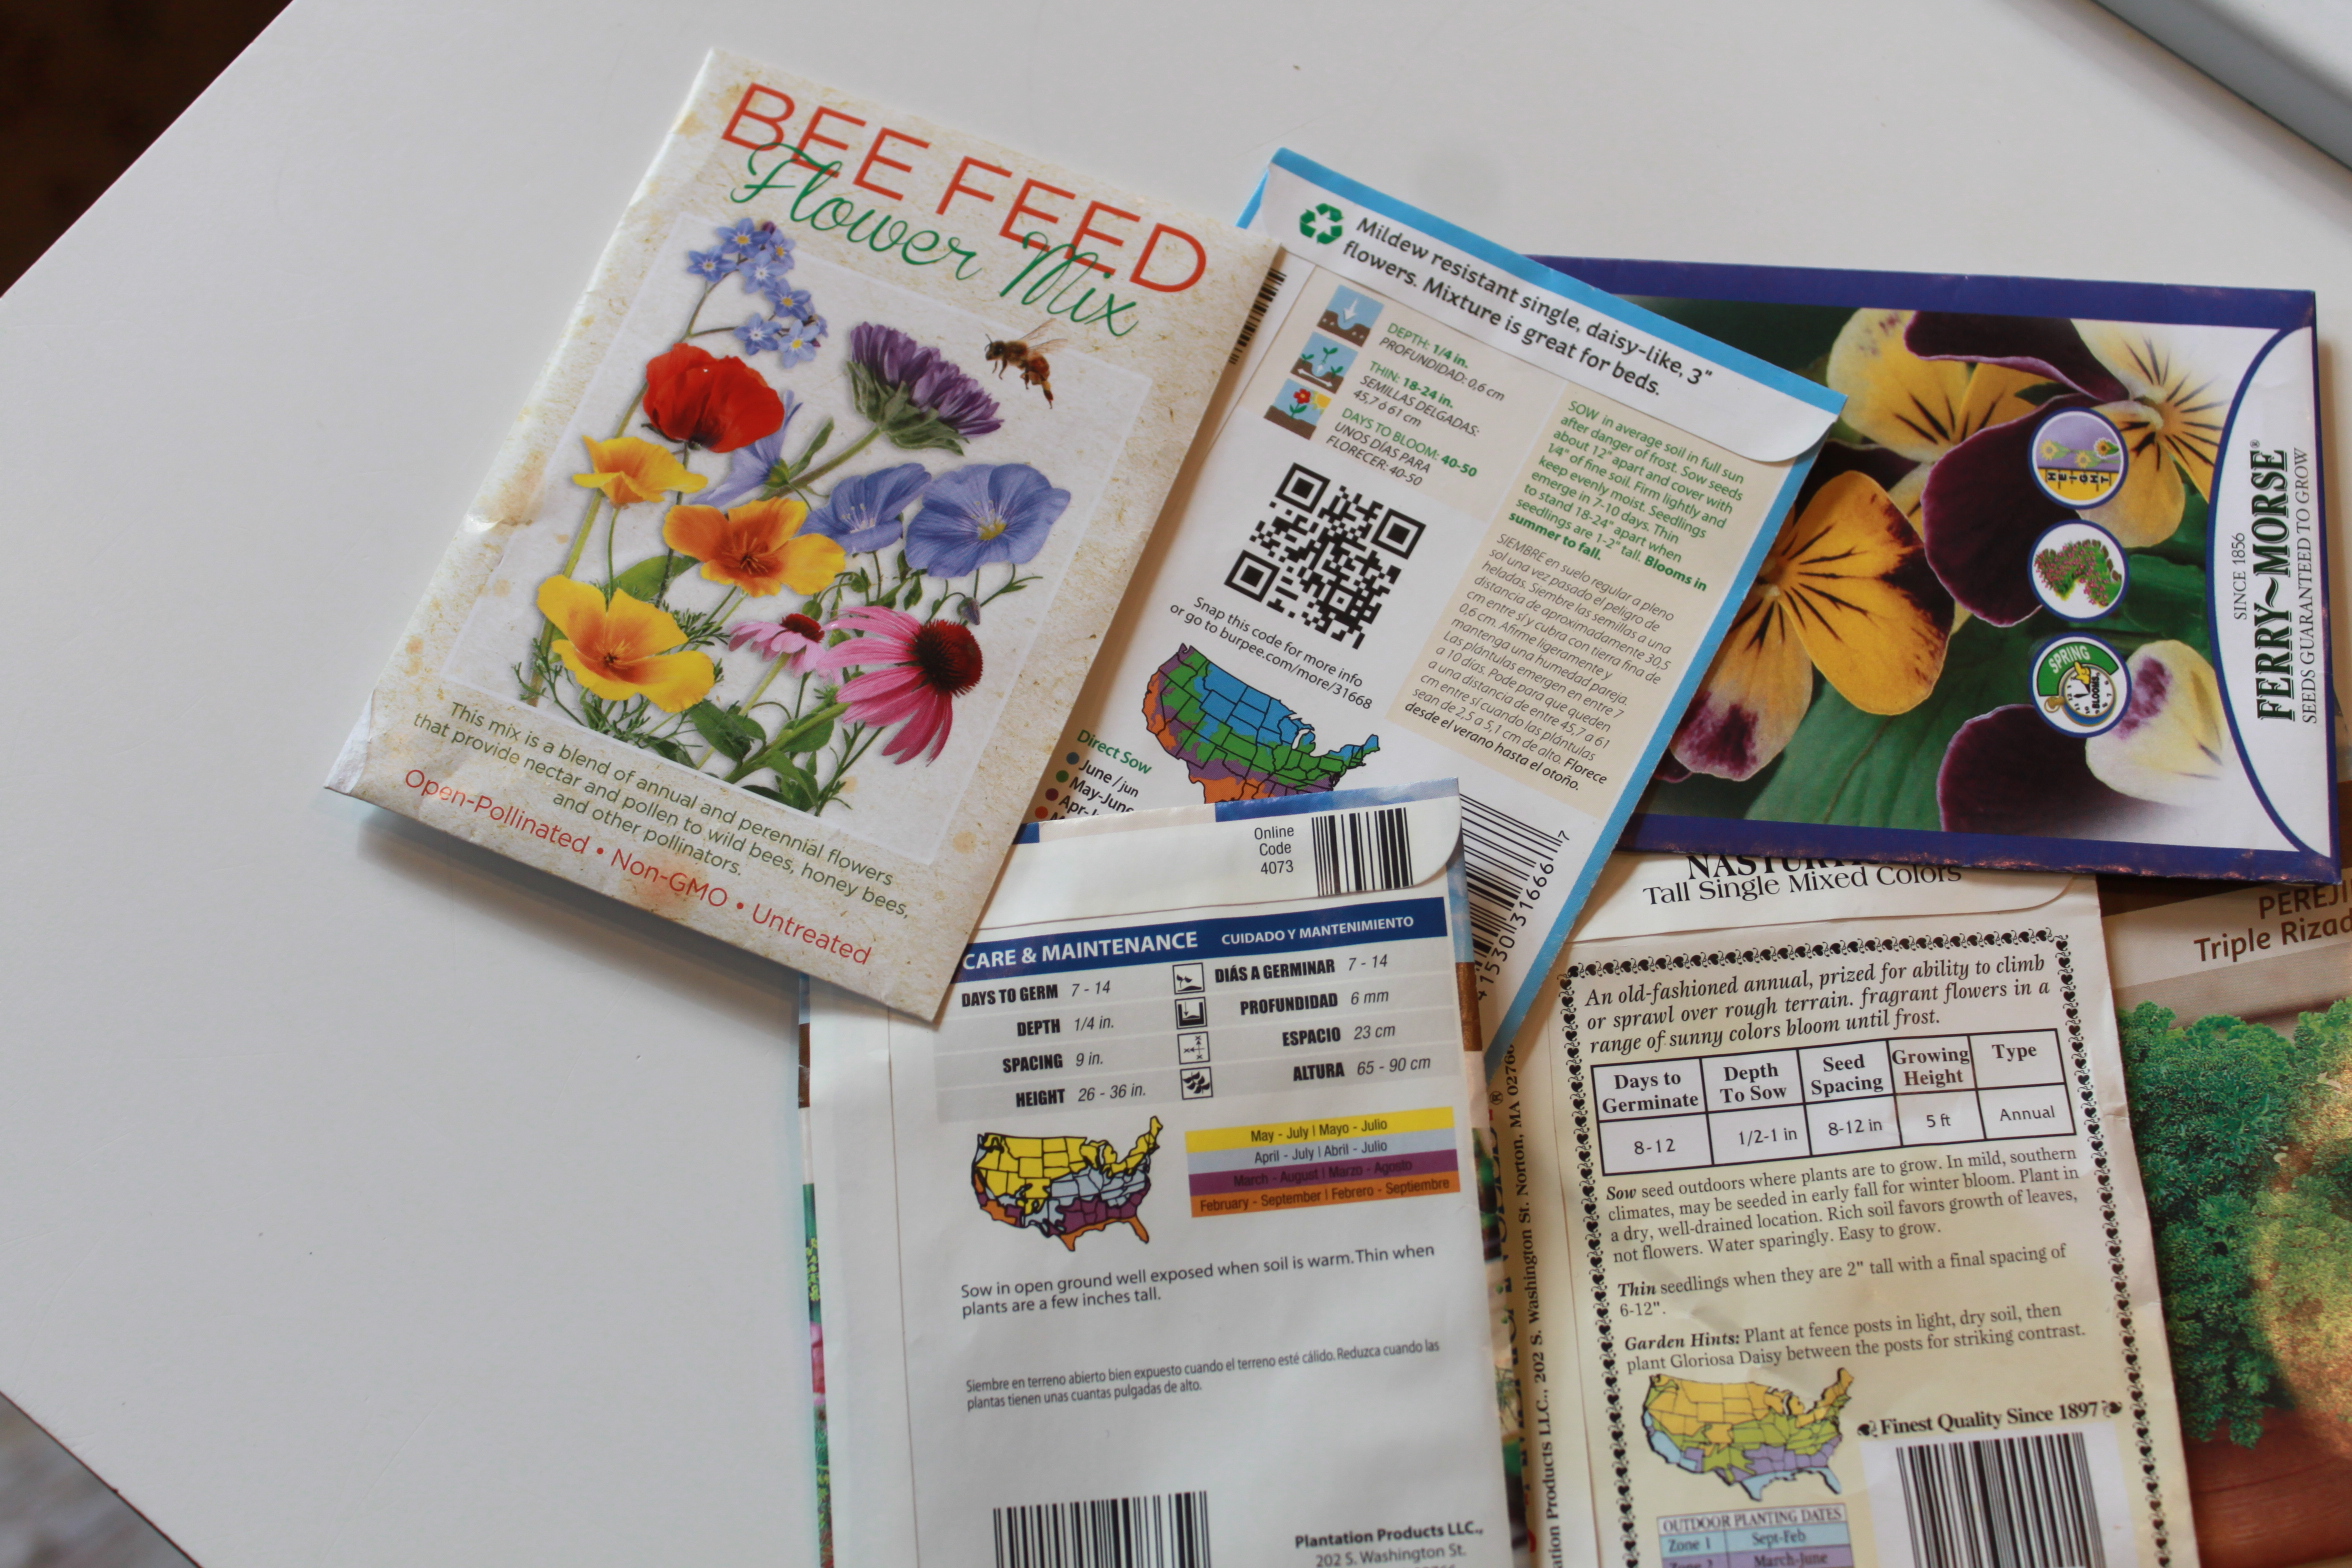
Don’t pitch those packets! Seed envelopes contain everything you need to know about how to sow and grow the seeds inside.
Pushing the Envelope: Reading seed packets
As you peruse the wide selection of seeds available online and in garden stores at this time of year, take a minute to read the packets and/or accompanying plant descriptions. You’ll find they contain a lot of important information, some of which might be unfamiliar to gardeners new to seed starting.
When selecting vegetable varieties for example, check packets for the number of days until harvest to be sure your choices will ripen before frost. Many long-season vegetables must be started indoors in early spring. Similarly, many annual flowers need an indoor start if they are to bloom during the summer.
For detailed info on deciphering seed-starting lingo, check out: How to Read Seed Packets and Information on Seed Packets.
To get the most out of the information provided on seed packets, there are several pieces of information you need to know. One is your USDA Plant Hardiness Zone, which often appears as a map with designated planting dates. Mercer County gardens are in either Zone 6b or 7a, depending on their location. To find out for sure which zone your garden falls into, just enter your zip code on the USDA website here: Find Your Plant Hardiness Zone.
Timing is Everything: Picking the perfect time to start seeds
When it comes to determining the proper time to start your seeds, there are two important dates to know:
- The average LAST frost date for your area ( the date in the spring when you can finally be sure that you won’t get another frost)
- The average FIRST frost date in your area (the date in the fall when frost is likely to start killing sensitive plants).
Here in Central New Jersey, our average last frost date is May 10. To be on the safe side, a good rule of thumb has always been to wait until after Mother’s Day to plant seedlings outdoors.
Our first frost is usually on or about October 15, which is important to know when growing certain vegetables from seed, to make sure they’ll have enough time to fully ripen before frost. (Rutgers Fact sheet Starting Vegetable Seeds Indoors lists how many weeks pass between seeding indoors and when transplants are ready for planting in your garden.)
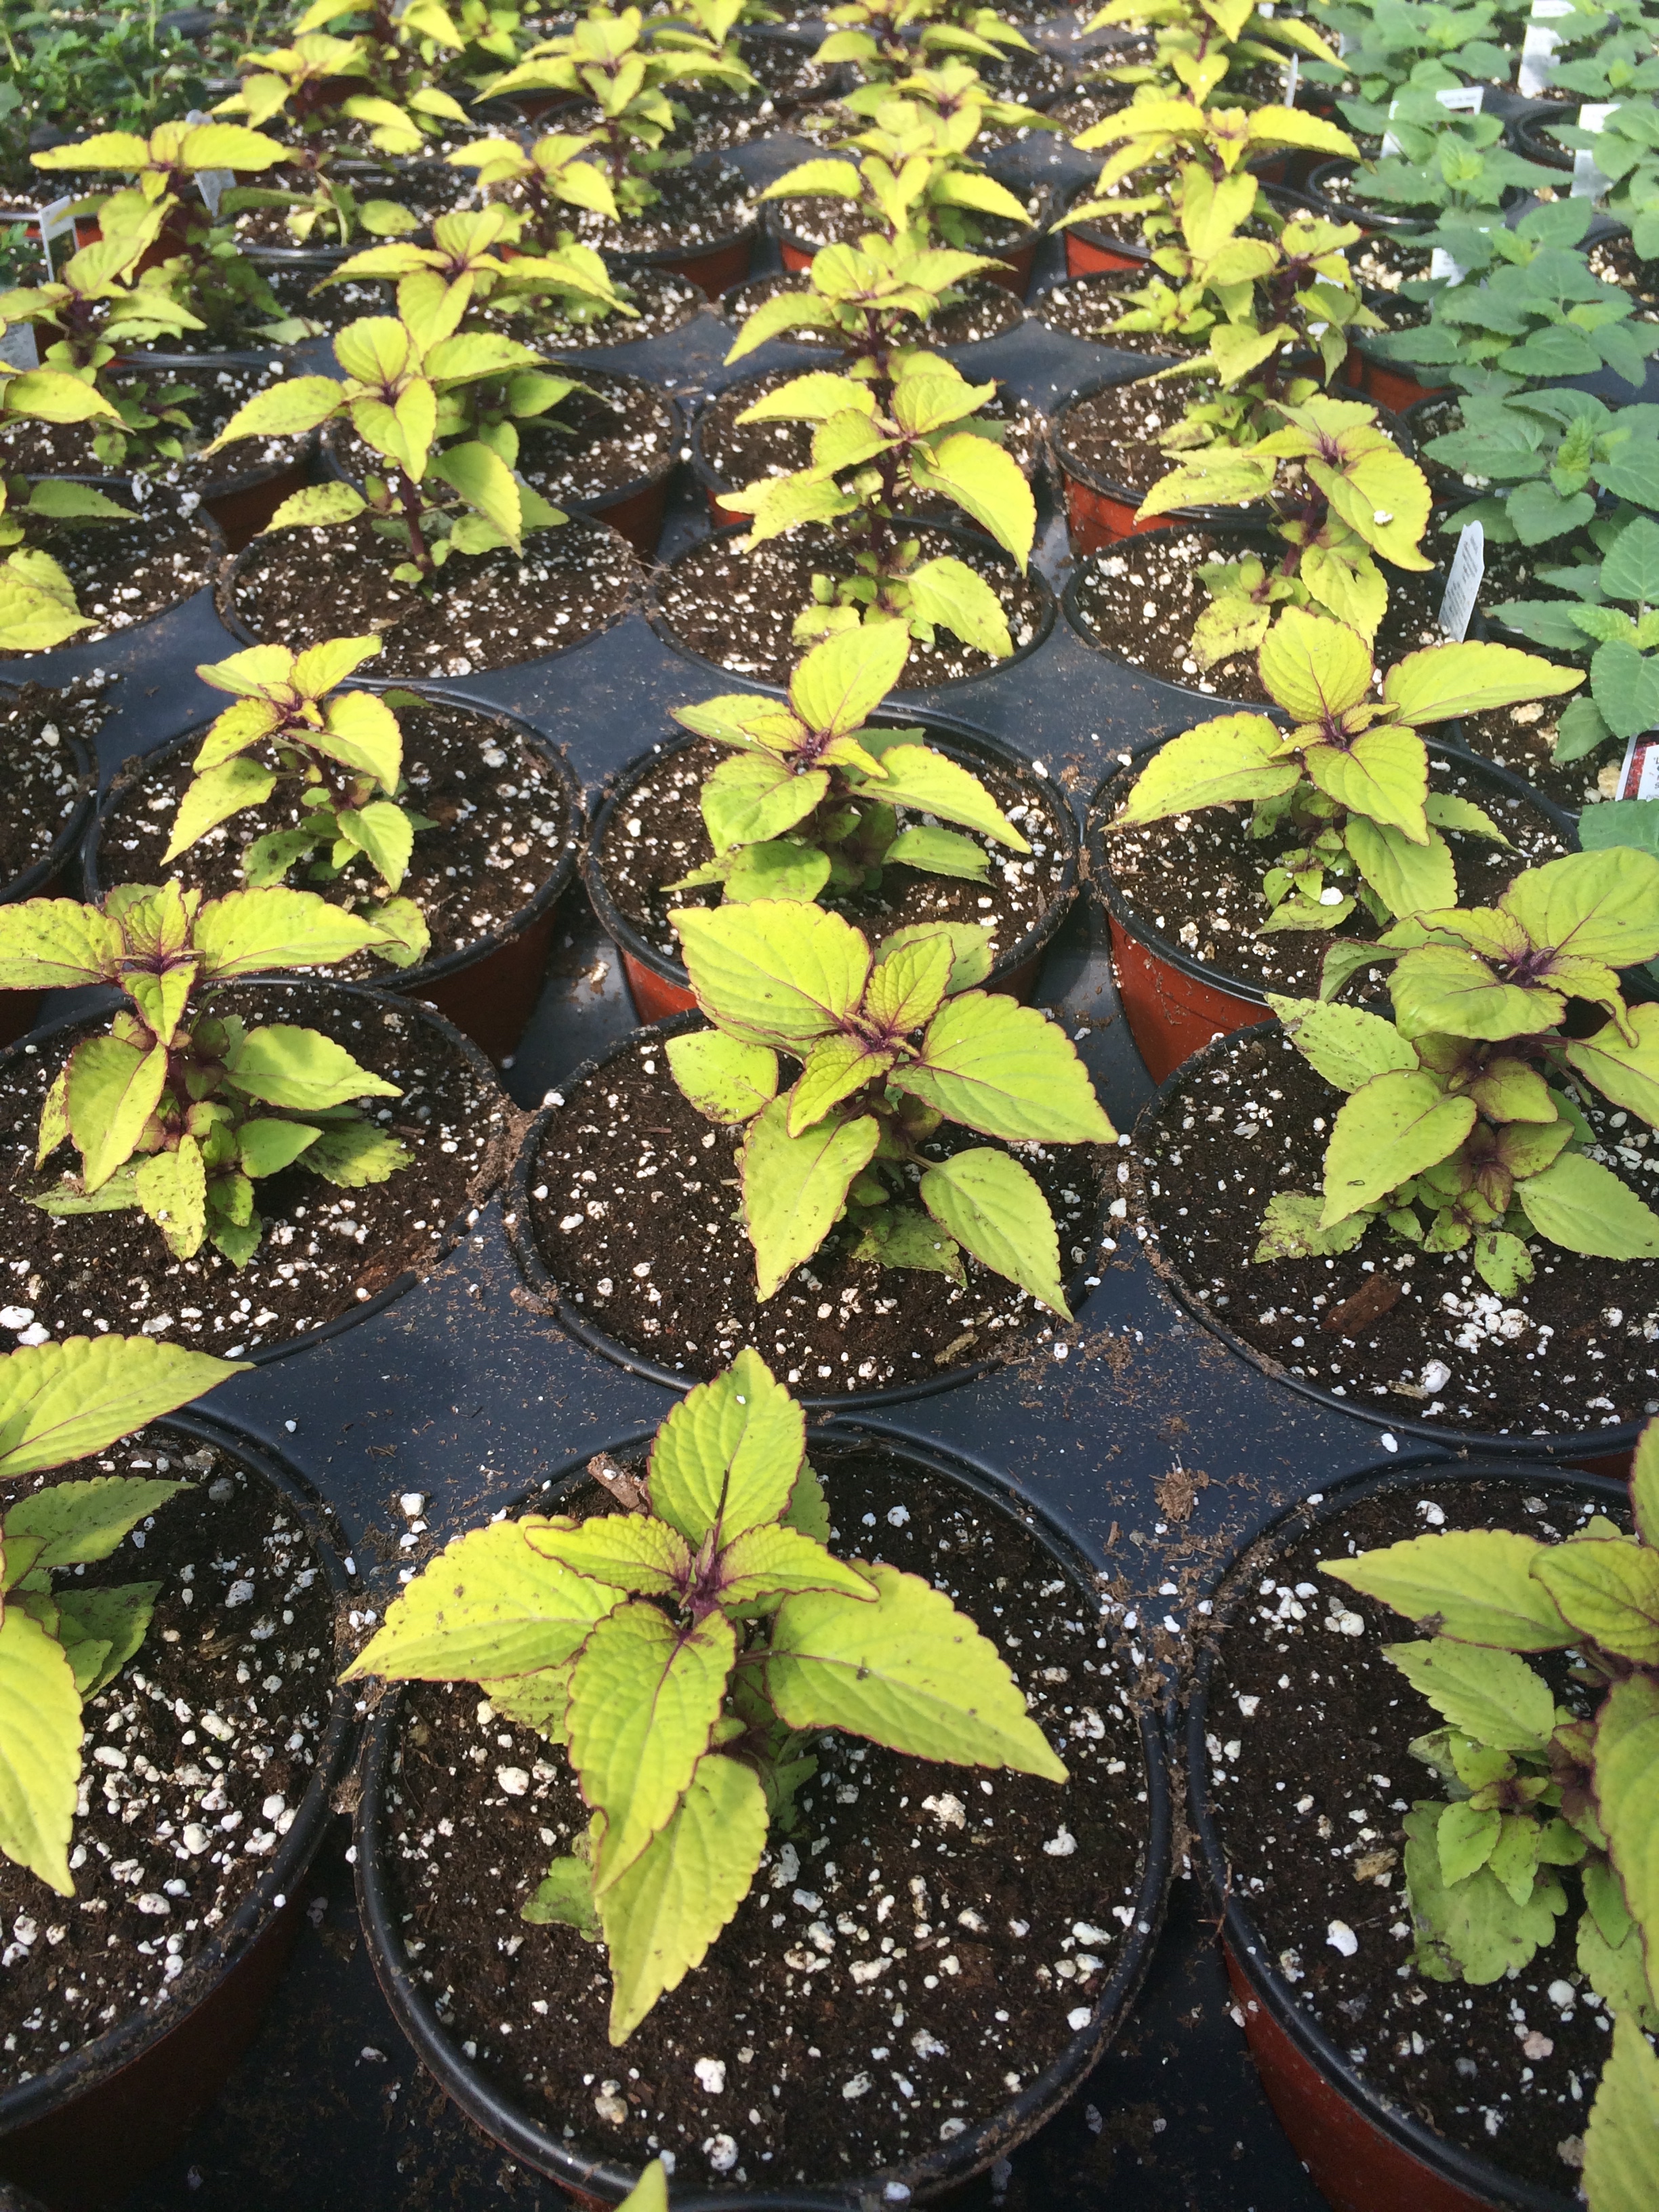
Starting seeds at the right time helps seedlings develop into sturdy, well-branched plants, like these coleus, (Plectranthus scutellarioides.) Since coleus likes warm weather, plants started indoors should be planted outside 1-2 weeks after the last frost date. (Photo by Elena Kyuchukova)
A common mistake new seed starters often make is starting seeds too early. If started too soon, plants tend to have spindly growth and may outgrow their containers before it is warm enough to transfer them outdoors. The goal is to produce stocky, moderately sized plants that will recover quickly when planted outdoors. To achieve this, it’s critical to start seeds at the proper time.
It All Adds Up: Seed starting math
To determine when to start your seeds, look on the back of your seed packet for the average number of weeks required to grow indoors or transplant outside, as well as the number of days to germination. (These two numbers are often listed as a range.) Add the time required for germination and time indoors to transplant. Then, on a calendar, count backward the appropriate number of weeks from your last frost date. The result will be the appropriate date for starting that type of seed. For an example, see below:
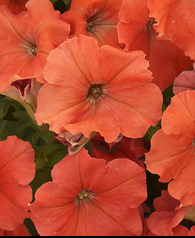
‘African Sunset’ petunias
The Annual Garden at Mercer Educational Gardens in Pennington will include ‘African Sunset’ Petunias grown from seed this season.
To determine the best time to start them indoors, Mercer County Master Gardeners took the “8 weeks indoors” listed on the back of the seed packet, and added the listed “7 days needed to germinate,” for a total indoor growing time of 9 weeks (1 week to germinate + 8 weeks indoors.)
They then counted 9 weeks back from our last frost date of May 10, and arrived at a seed start date of March 8.
Down to Earth: Soil for starting seeds
Seeds should be planted in clean, fine potting soil– generally no deeper than the width of the seed itself. (Photo by Margaret Montplaisir)
Choosing the right potting soil is another important part of successful indoor seed starting. The most convenient choice is to purchase a commercially available soilless mix, one specially formulated for starting seeds. Most contain a mix of peat moss, perlite, vermiculite, and usually some fertilizer. Soilless mixes are also sterile and reduce the risk of losing seedlings to soil-borne diseases.
You can create your own seed starting mix too (a recipe is contained in Rutgers fact sheet Starting Vegetable Seeds Indoors ) but know that using soil directly from the garden is not recommended, because it may contain insects, weed seeds, or disease organisms that could damage or kill young plants.
Pot luck: Choosing containers for seedlings

Peat pots can be planted directly into the garden, which keeps developing roots intact. But make sure the edges of the pot do not stick up above the soil, since the exposed area will act as a wick and cause moisture to evaporate rapidly from the pot.
Almost any clean container can be used for starting seeds provided it’s at least 2 inches deep and allows for good drainage.
Some gardeners like to save money by reusing yogurt containers, milk cartons, aluminum pans, and clear clamshells from the produce department. A 6-ounce plastic, non-waxed, paper drinking cup also makes an easy and inexpensive starter container. Before using for up-cycled containers for seeds, be sure to poke some holes in the bottom to allow for proper drainage. Otherwise, soil can become saturated, which encourages diseases in the seedlings. One way to minimize the chance of overwatering seedlings, is to be sure to start them in small containers.
In addition to using recycled containers, there are a lot of choices available for purchase, including:
- Plastic trays (flats) that are 10.5 in. X 21 in. X 2 in. deep
- Small pots and pellets that expand when you add water made of compressed peat
- Plastic cell packs (inserts or market packs) with square or rectangular plastic cells joined together and sized to fit into a plastic flat. The individual cells range in size from ½ to 4 inches in diameter
- Plug trays in sturdy one-piece plastic flats that are divided into individual cells
Hit the Dirt: Planting how-to’s
Regardless of the type of container you choose, fill it three quarters full with seed-starting mix and sow the seeds. Be sure to place seeds at the planting depth recommended on the seed packet. Plant one or two seeds per individual container or, if using flats, you can plant in rows that can be thinned or transplanted into individual containers following germination. Be sure to label the flats to avoid confusion, using a pencil or water-resistant marker. (It’s easy to forget which sprouts are which.)
When seeding a tray or flat, plant in shallow rows 1 to 2 inches apart. Sow the seeds uniformly and thinly in the rows. Be sure to label each row right away with plant type, variety and date of planting.
Water Ways: Keeping seedlings moist
Once the seeds have been planted, the container should be watered from the bottom by placing it in a shallow pan of water and waiting until the surface of the mix is moist. This method avoids overhead sprinkling, which can carry away smaller seeds. The pot should then be removed from the pan and allowed to drain.
It is important to keep the soil moist at all times, watering again from the bottom as necessary since seeds and seedlings are extremely sensitive to drying out.
Placing the container in a clear, plastic storage bag until seedlings emerge will help keep the soil moist. This will also increase the humidity and help keep temperature stable. The plastic should not be in contact with the soil, though. Be sure to remove the plastic cover as soon as sprouts appear.
A Fungus Among Us: The danger of damping-off
While seedlings should be kept moist, they should never be kept continuously soaking wet, since this condition can lead to “damping-off,” a fungus disease that is deadly to young plants. The fungi that causes the disease – –Pythium, Phytophthora and Rhizoctonia– – can quickly kill an entire batch of seedlings. If an infection occurs, dispose of the plants and growing medium, wash containers and tools to remove any debris, and soak them for 1-2 minutes in a solution of 1 part chlorine bleach to 10 parts water. Then rinse with clean water.
The Heat is On: Keeping seeds warm

The consistent warmth provided by electric heating mats –like the black and green one visible above– can be very beneficial to certain types of seedlings, leading to better germination rates and stronger root systems. (Photo by Ellen Kellich)
In addition to moisture, seeds need warmth to germinate. For the best results, keep seedling pots in a location that is between 70 to 75 degrees F. Spots like the top of a hot water heater or the top of the refrigerator offer enough warmth to aid germination.
Or you can purchase heating mats that are specially designed keep germinating seeds warm. You can find them in larger garden centers, and online. Be sure to only use mats that are designed for seed germination and follow manufacturer’s directions carefully. Using a thermometer or thermostat in conjunction with seed mats will prevent overheating seeds and soil.
Let there be Light: Simulating spring sun
Better results stem from growing seedlings under fluorescent lights( rather than to relying on natural light alone.) Lights should be positioned very close to seedlings –2 to 4 inches above them is best. (Photo by Ellen Kellich)
Once the seedlings emerge, remove plastic bags or covers and give the seedlings as much light as possible so they can grow into stocky well-branched plants.
While it’s possible to grow seedlings without supplemental lighting, the fact is: you will have much better success growing under lights compared to relying solely on natural light from windows.
There are many types of lights that can be used to grow seedlings indoors. They range from fluorescent “shop lights” to the newer LED light systems. What’s best for you depends on your space and budget. For the most part, standard fixtures with a combination of cool white and natural daylight tubes provide adequate light are relatively inexpensive.
It’s important to keep lights no more than 4 inches above the tops of your seedlings. As close as 2 inches is ideal. Lack of light is the major cause of elongated, skinny stems which results in frail and floppy plants. Hanging lights from chains or pulleys makes it easier to keep them at the optimal distance as plants grow.
Plants need 12 to 16 hours of light daily, but don’t leave lights on all the time. Plants need some dark periods too for proper development. Adding an inexpensive timer to your light set up can help ensure plants get the right amount of light and darkness.
Numerous plans for easy-to-build light stands are available online, including this from University of Maine’s Cooperative Extension: Bulletin #2751, Starting Seeds at Home and this Do-It-Yourself PVC table-top light stand from the University of Maryland.
Room to Grow: Moving seedlings to larger containers
As seedlings grow, they must be potted up into larger containers to give them enough space to develop. Avoid the common mistakes of keeping seedlings in flats too long, which can hinder their growth.
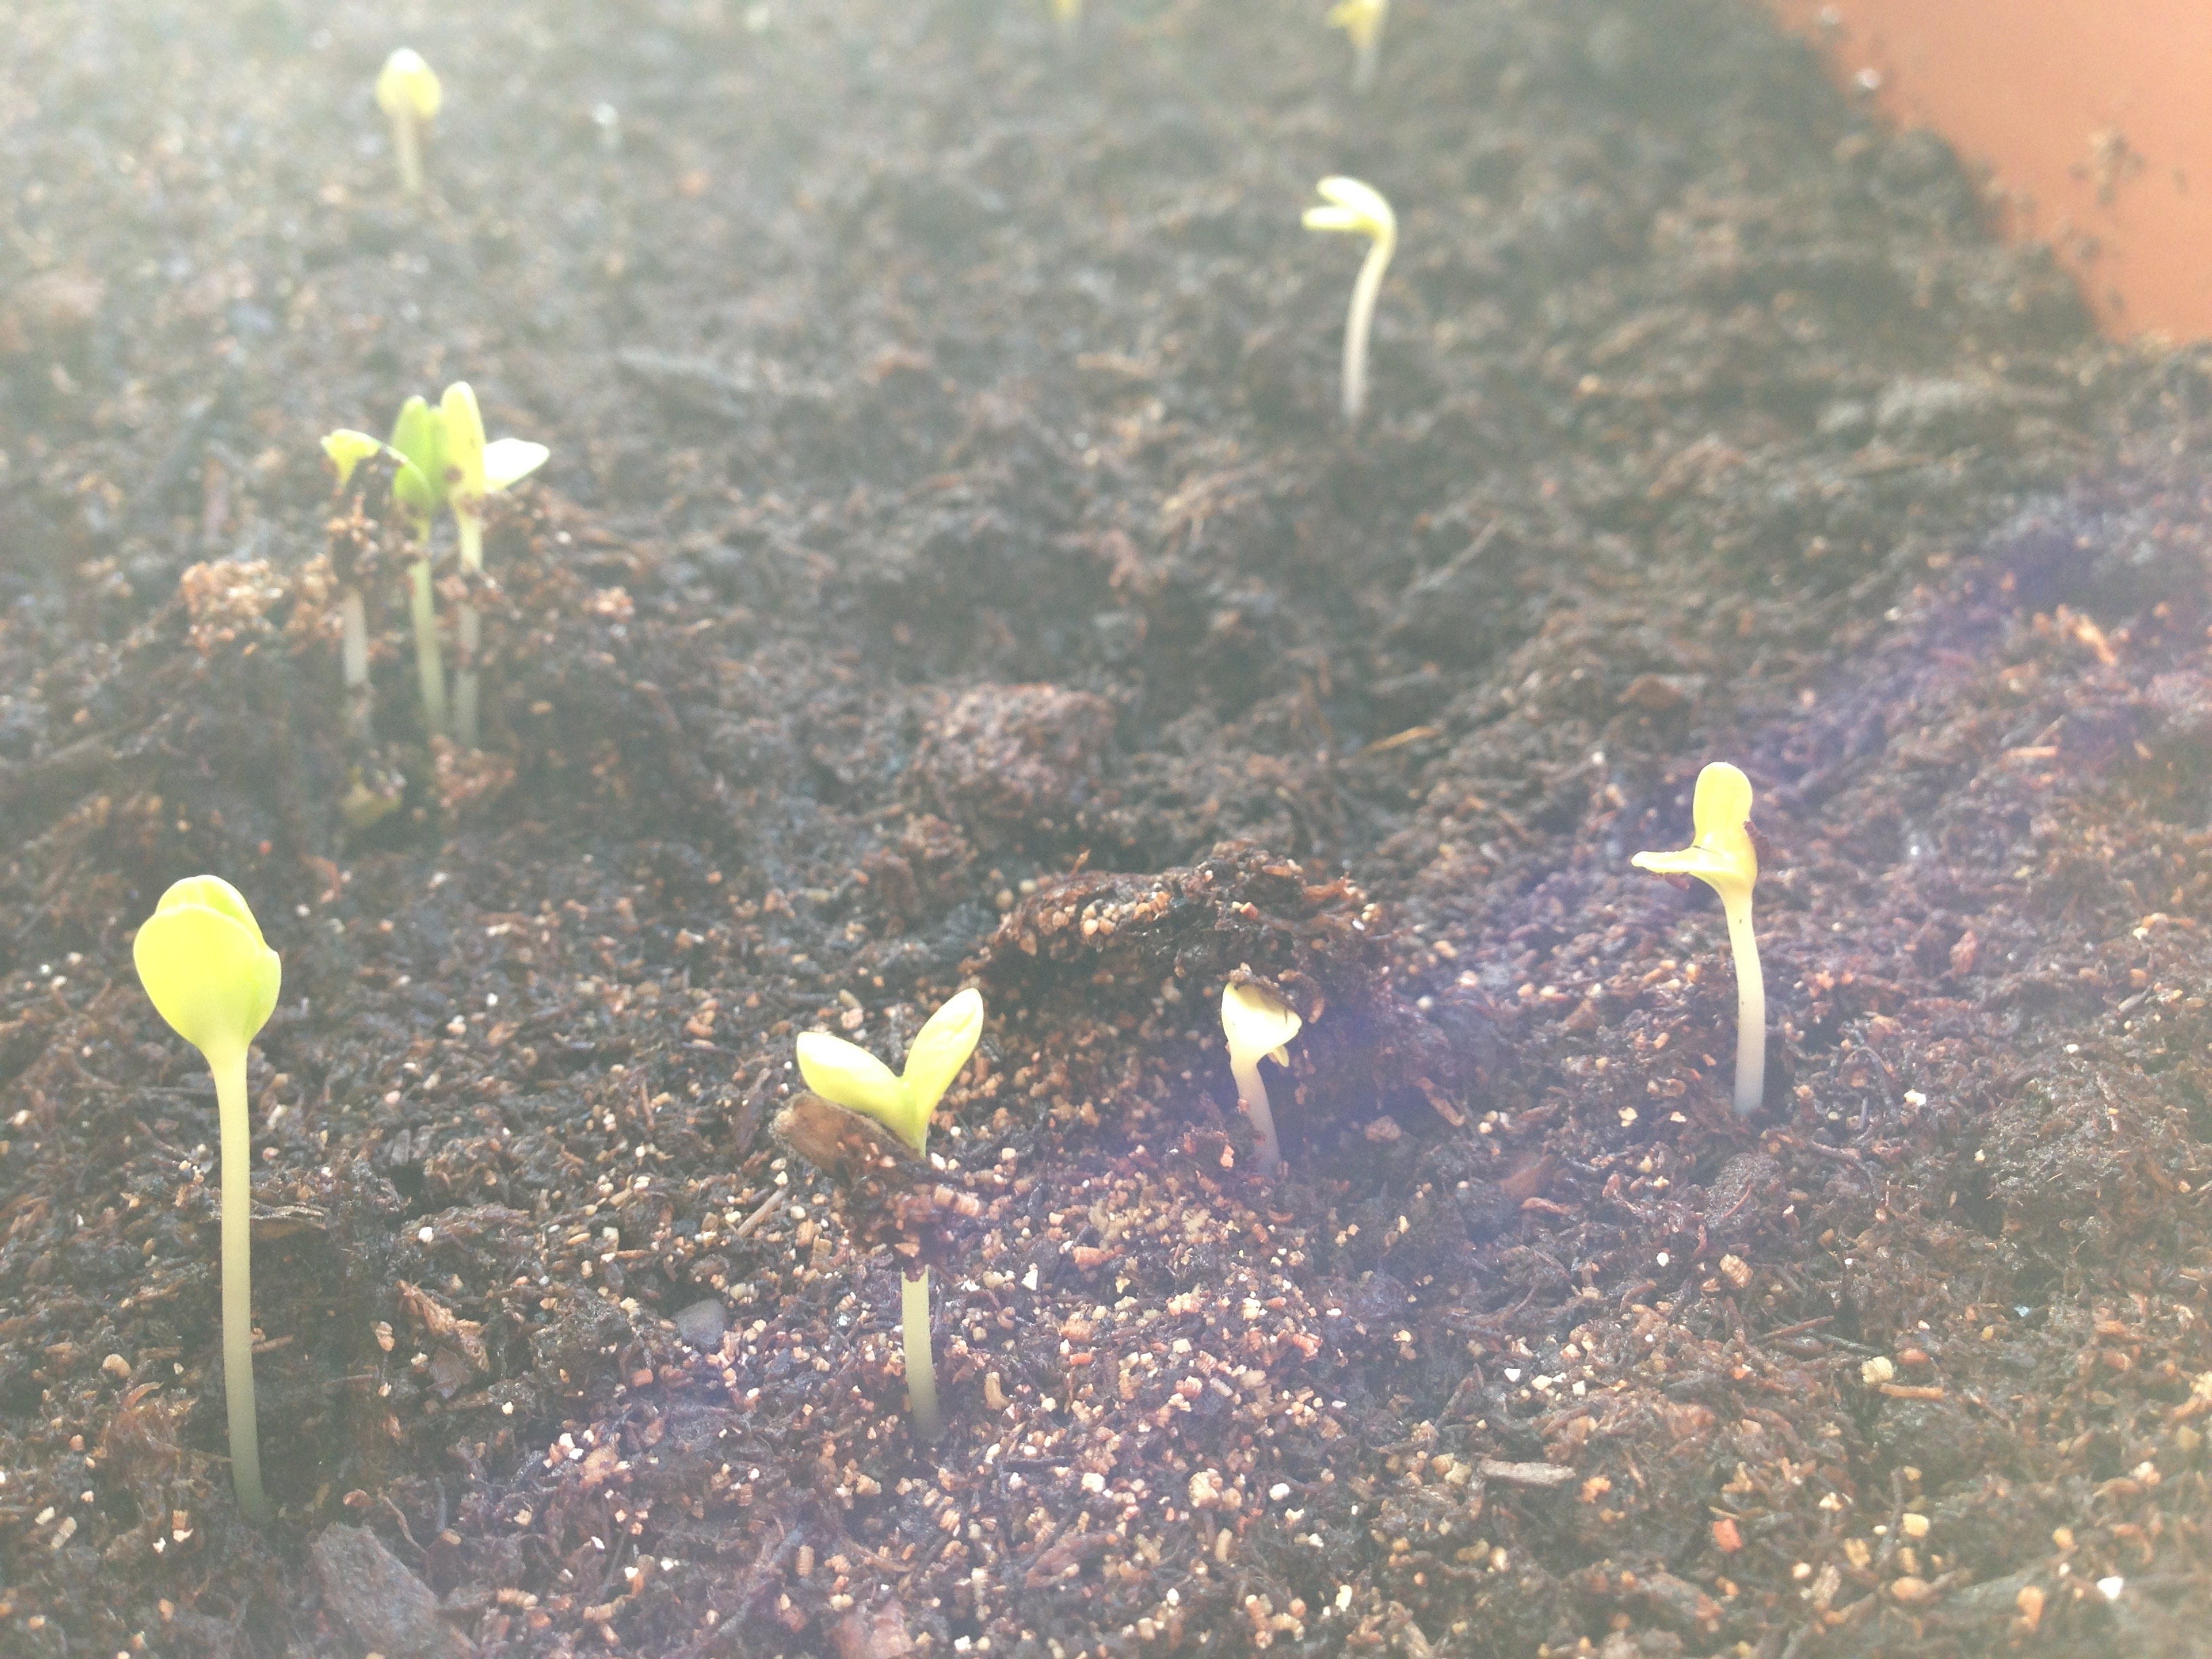
The ideal time to transplant young seedlings is when they are small and there is less danger of setbacks from root shock. This is usually about the time the first “true leaves” appear above or between the “cotyledon” or “seed” leaves, which are the first leaves to appear. (The seed leaves are visible in the photo below.)
Dig the seedlings out of the mix with a small trowel or spoon. When transplanting, always handle the seedlings by the leaves, being careful not to damage the fragile seedling stem or root system. Then transplant them gently into their new containers.
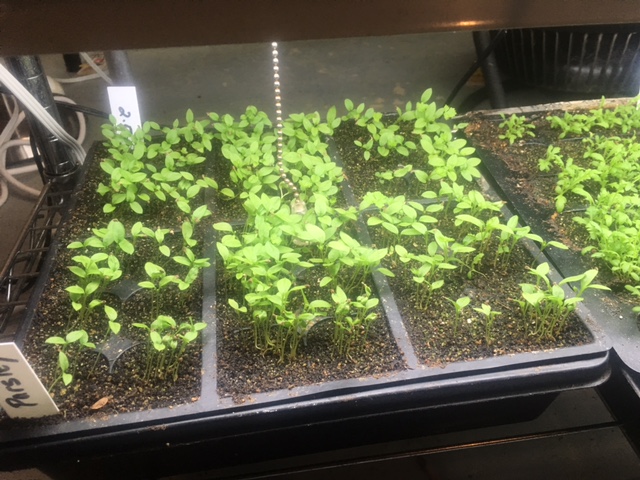
When planting in flats, like these parsley plants, seeds can be planted in rows. Once each plant has four leaves, thin seedlings by pulling out all but the healthiest plant. (Photo by Ellen Kellich)
Ready for the Great Outdoors: Hardening off
Seedlings are ready to transplant outdoors when their roots have filled the pot in which they are growing. Check instructions on the seed package for any specific details on when and how to transplant.
Before planting the seedlings in your garden, allow at least a week for them to become adjusted to the outdoors. Each day, place them outside in a sunny spot for a few hours, and then bring them back inside. Gradually increase their length of time outside.
It’s best not to set out tender seedlings on windy days or when temperatures dip below 45 degrees F. Even cold-hardy plants will be hurt if exposed to dramatically colder outdoor temperatures.
After a week, seedlings should have adjusted sufficiently to the outside world to be ready for planting in the garden. When planting seedlings outside, pay attention to the spacing indicated on the seed packet.
Seedlings should be planted at the same depth at which they were growing indoors, except for tomatoes, which may be planted deeper. For more info on planting vegetable seedlings, see the Rutgers fact sheet Planning a Vegetable Garden FS129.
If possible, try to transplant on a cloudy day to minimize wilting or transplant shock. Once the seedlings are in the ground, firm the soil around the root ball, and water immediately with a solution of water and starter fertilizer.

After about 6 weeks indoors, these beautiful kale plants are ready for the real world. (Photo by Elena Kyuchukova)